What's Popular

Meh, Whatever is Featured

Linking Active Directory to Palo Alto

 ###First you need to create a server profile under the LDAP section. DEVICE>Server Profiles>LDAP then click on the Add down at the bo...

Showing posts with label VMware Datastore. Show all posts

Monday, November 19, 2018

Creating a New Datastore in Cisco HyperFlex Connect

1.    First log into your Cisco HyperFlex Connect.
2.    Once you have logged in, you will see your Dashboard and can check to make sure the cluster is healthy.


 3.    Once you have verified your cluster is healthy, click on the Datastores tab under the MANAGE section on the left hand side.


4.    Now that you are in the Datastore section, you can click on Create Datastore in the top left corner of the Datastore section.


5.    After you click this, a pop-up box will come up and you can type in the information for your datastore you wish to create.
    o    Datastore Name: You can name your datastore whatever you wish. This will be the name that shows up here, and in your vCenter, or other virtual manager device.
    o    Size: Also simple, you can choose the size of your datastore. This is going to be based on your requirements and available storage.
    o    Block Size: Have not had to mess with this, and I will provide more information once I read more into this. I keep default for now.
    o    Create Datastore: Click here to complete and finish your datastore.


6.    You should see your datastore show up in the HyperFlex Connect datastore list.


7.    Also, you can head over to vSphere and check the datastores in there to verify it also shows up there.
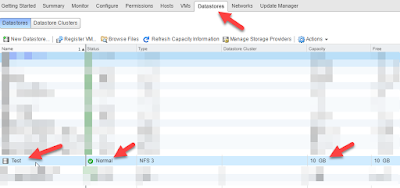

8.    You are finished and can now start adding systems and data to the datastore.

Thursday, September 13, 2018

Getting Rockstor to work in a VM for vSphere/ESXi Deployment

•    Rockstor will not always work with vSphere/ESXi in a VM format. You will have to edit one file after you deploy/install your Rockstor VM.
•    The first step is to navigate to the data store on your ESXi data store. You need to open the VMs folder directory.
•    Within the VM folder directory of your Rockstor VM, click on the .vmx file and download this (this is just the .vmx file which is for VM customization).
•    Once the file is downloaded, open the file in Notepad++ or another notepad type file, and add the following line in the .vmx file Do not use the enclosing quotes, only use the quotes around the TRUE statement:
    o    “disk.EnableUUID=”TRUE””
•    Once this has been changed, save the file.
•    Navigate back to your VM data store and VM folder directory.
•    Click on the Upload link in the top right of the folder directory.
•    Select the new .vmx customized file and upload it.
•    You might also have to do these steps in vSphere to finish the TRUE statement if it does not take:
    o    Right click on the VM.
    o    Click on the VM Options tab.
    o    Click on the Advanced section.
    o    Click Edit Configuration tab.
    o    In the disk.EnableUUID, change from FALSE to TRUE.
•    Now, Rockstor is ready to be used as a VM in your environment.


Thursday, May 10, 2018

Adding Rockstor NFS datastore to the vSphere


  •  First log into Rockstor (log on through the web browser either through IP or FQDN) and click on Storage (top center Tabs), then click on NFS under File sharing.
  •  From here, you need to create a new host string. This allows your file share to talk to vSphere/be added to hosts. You can either do an IP address range with wildcard (*) where needed, or you can specify FQDN and other options.
  •  For our specific demonstration, we will click “Add NFS Export”
    • From here we will click on the shares to export (which file share we wish to share).
    •  And then put in the NFS clients by either IP address, domain names etc (example would be IP: x.x.x.x).
    • Access type, you designate Writable if you want them to control items in the share, or read-only if you only want them to see it.
    • Response type, I may be wrong on this, and I am not a data storage expert, but I have read the async option allows simultaneous read/write processes to happen while sync will wait for processes to be done.
  •  Once this has been completed, you are ready to mount the datastore in vSphere by using the example shown in Rockstor: /export/<share_name> <mount_pt>
  •  In vSphere you will navigate to the Storage menu however you please, either clicking on Storage from Home, or Storage from the Navigator menu.
  •  Once you are here, you click on the data center which you would like to add storage to.
  •  Click on the New Datastore icon in the top left of the datastore listings.
  •  On location either select the datastore you want, or click next.
  •  Click NFS
  •  Choose either 3.0 or 4.1 NFS (3.0 is basic, 4.1 NFS allows Active Directory and other features)
  •  Now you have to input the following in the “Name and configuration” screen:
    • Datastore name: what name you want this datastore to show up as in vSphere.
    • Folder: this depends, but for Rockstor, it will be /export/test/test (just make sure you have the export in front of your share. The whole purpose of this is to have vCenter/vSphere map the exact share you wish to map).
    •  Servers: this is the IP, domain name of the server, etc.
    •  Finally, you will either have a “servers to be added” section, or not. This depends if it was NFS 3.0 or 4.1. Just select the server you want to pull the share from.
  •  Section 5 is configuring Kerberos authentication. Put in your Kerberos details in if you are authenticating/adding with that option.
  • Host accessibility tab just allows you to designate a host to assign the datastore to. Could be esxi-1-test, or IP, x.x.x.x
  • Finally, you can review your settings under the Ready to complete section.